The Gamasutra Deep Dives are an ongoing series that aim to shed light on how specific design, art, or technical features within a video game come to be, in order to show how seemingly simple, fundamental design decisions aren't really that simple at all.
Check out earlier installments, including creating drama through a multitude of simple tasks in Bomber Crew, or maintaining player tension levels in Nex Machina, and achieving seamless branching in Watch Dogs 2’s Invasion of Privacy missions.
Who: Thomas Vasseur, artist at Motion Twin
Hello friends,
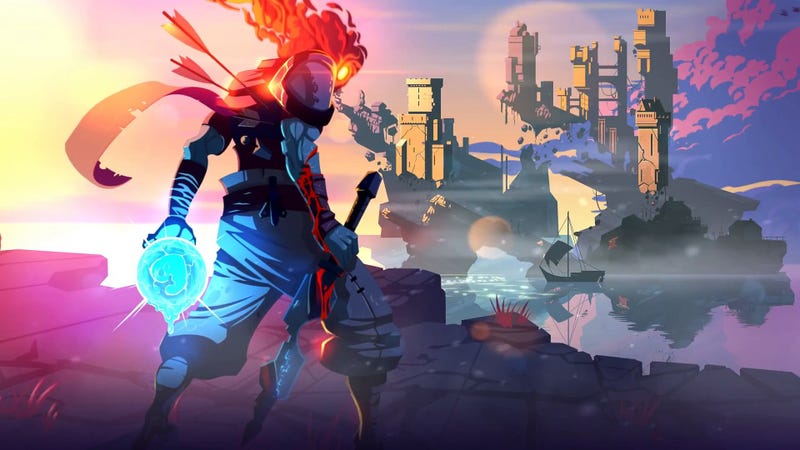
“Big dreams yet limited means” could be the motto of pretty much all indie teams out there. It certainly was mine when I began work on our first steam game, Dead Cells, here at Motion Twin.
My name is Thomas Vasseur and for one year, I was the only artist on Dead Cells, designing and animating every aspect of the game. I was in charge of the Art Direction, characters, monsters, animations, special effects (FX) and most of the background of Dead Cells all on my lonesome… Until, fortunately, my evil twin Gwenael Massé came to help, factually doubling the number of artists on Dead Cells.
However, since being understaffed is a common reality in our sector, I think you might be interested in learning how I managed to stay sane during my time alone in the trenches. Assuming I’m still alive and all of this is not just an illusion.
What: A 3D workflow to design qualitative animations and new models - fast
I began by drawing a very basic 2D pixelart model sheet, which I use as a base creating the character and its skeleton in 3D (with 3DS Max), then I export it in filmbox format. The 3D modeling is very basic and would probably make the eyes of any credible 3D artist bleed.

But when the ingame height of the character will only be 50 pixels, well, spending lots and lots of time and energy on the 3D model seems quite cost inefficient.
A little homebrew program, developed for this very specific task, then renders the mesh in a very small size and without antialiasing, giving us that pixelated look.


Now, it’s time to make the model move. Dead Cells’ animations are designed, like 2D animations, on key frames. Once, and only once, the animation is convincing and correctly timed with the least amount of frames possible, I add interpolation frames before or after the key frames. Never in-between. Therefore, our attacking animations are essentially pose-to-pose animations, and we utilize VFX to give a sense of movement, impact and strength.


At this point, most of the work is done. We export each frame of the animation we made with the 3D skeleton to a .png, along with its normal map, allowing us to render the volume using a basic toon shader.


Exporting the whole as a sequence of frames also allows us to slip in a blend mode or two for an added wow effect.

Of course, these damn gameplay programmers can never get anything right the first time… They are always changing their minds. Which they actually should, really. In this case, my process for handling retakes is fairly simple demanding very little time. If the timings are the issue, moving the keyframes in the timeline will do the trick. Changing the pose isn’t really a problem either.
Let’s say this weapon is way overpowered, and we choose to slow down the attack animation to nerf it a bit.

Just moving the key frames and adjusting the pose to the new timing allows me to make my gameplay programmer happy (and me too, because I don’t have to throw my work - and eventually myself - out the window).


Actually, both of these retakes combined took me less time than uploading these GIFs, but that may also be because I’m a very inefficient Gif maker.
This 3D workflow also offers two other major advantages compared to a more traditional 2D process. Firstly, if I want to add some elements to an old model, for instance, a piece of armor, it’s easy as pie. I just have to attach the asset to the 3D model.

But the real benefit of 3D modeling is the ability to reuse old assets, designed for previous sprites, when creating new characters (in our case, mostly monsters).

This is probably the single most useful little trick in our workflow, sparing me hundred of hours of work, so I’ve got that going for me, which is nice.
Why?
We all love hand drawn pixel art animation. But I, Thomas, was all alone (sorry, I couldn’t resist) and as my “career” background will convince you, I did not have the skills nor previous experience to hand draw everything AND be quick enough doing it to be able to release the game before the next decade showed up.
I joined the videogame industry in 2008, working for several years on casual and F2P games, which were never published, for small french companies, who don’t exist anymore. I only began drawing pixel art in 2013 when I was hired by Motion Twin, where I worked on five games: Brutal Teenage Crisis, Green Witch, FAFI 360, Uppercup Football and Monster Hotel. I would be very surprised if any of these names rang a bell.
To sum up the context, when we began the development of the first iteration of Dead Cells in 2015, it was my very first project of this scale, I can shamelessly confess I wasn’t (and am still not to this day) an expert animator and I was still pretty much a newcomer to pixel art. Looking back, this last part may actually have had a lot of positive impact on the final rendering of Dead Cells, as I never felt tied to conventions and traditions of the “old-school pixelart” style.
To make up for the lack of bandwidth and still deliver on the quality the team demanded, we had to find a process, a pipeline, or anything really, that could give us great looking pixel art, without having to hand draw each and every retake. The trick was to come up with a good looking game without committing an unreasonable amount of time and energy to the process, or sacrificing my first born to Satan.
From an artistic perspective, the list of requirements was the following:
- Lots of varied backgrounds with beautiful lightning and sceneries.
- Impactful animations to give the combat a nervous, beat’em-all-ish feel.
- Loads of gross monsters.
- An abundance of weapons with specific gameplay.
The 3D Dead Cells workflow I have described above actually has its roots in another project. In 2015, Matthieu Capdegelle (one of the Dead Cells devs), Yoan Laulan (also working on Dead Cells as Sound Designer) and I partnered to enter the Ludum Dare 32. We came up with a game called ScarKrow, a 72-hour-prototype-of-a-game, and maybe the first sign that we wanted to make a fast-paced, violent, platformer. However, using Flash, It took me ages to draw half-decent 2D animations and, in the end, the results didn’t really live up to our expectations.
Although, at the time, we saw some potential in the concept, and Motion Twin has always been a company where experimentation is encouraged, even if nothing comes out of it. After the Ludum, we spend a good 3 weeks working on ScarKrow and at this time I already knew I couldn’t keep up with the pace with a traditional workflow.
Drawing inspiration (excuse the pun) from King of Fighters, Blazblue and, later, the last Guilty Gear, we decided to make the most of 3D animation. This method gave us several advantages:
- No need to redraw each frame
- Possibility to reuse the same animation on various models
- Automatic generation of the interpolation frames to get smooth animations
- Quick and easy retakes to match the gameplay
With this method, we were able to hit 30Fps for the animations, which doesn’t cure cancer, but may help a bit with the flu (as everyone knows), and it saved us heaps of time. The prototype is freely available here, if you want to see how it looks for yourself.
With Dead Cells, we had a couple of issues to fix before we could reuse the same workflow. Firstly, with ScarKrow, I had to draw all the shadows by hand on all the frames, a costly process we avoided by designing a lightning system with that in mind. And Dead Cells, as opposed to ScarKrow, was a pixel art game so we also had to build a tool to “pixelate” the characters. We knew we would have those needs beforehand because we allowed ourselves to experiment in the past, so this is a practice I highly recommend.
Result
In retrospect, the most important advantage of this workflow has to be the ease of doing retakes. The satisfying and nervous combat at the core of Dead Cells is the foundation the rest of the mechanics are built on. In the previous projects I worked on, where I was doing traditional hand drawn animation, we could not do retakes on animation once we had finished them. It was simply too costly, we didn’t have the time. As a result the final gameplay took a big hit. And directly adjusting the speed of the animation in the code wasn’t taking up the slack
In Dead Cells, when we implement a new weapon, we can adjust the timing of the animations dozens of times in minutes. And we can take into account the feedback from the community without looking too much at the time we will have to spend to accommodate a fair suggestion.
Of course, a 3D model workflow didn’t come without its own specific issues. We had to find a way to render a 3D model in low res pixel art. We solved that using cell shading on our models rendered in low resolution, without any anti-aliasing, but we still haven’t found any solution for flickering pixels for instance. Well, we could clean that by hand… but the point of this workflow is to go fast... and we prefer spending our time on concept designs! The disappointing level of details is and always will be an issue in my eyes, but we decided to favor the animations over that and we take full responsibility for the choice. Movement is love, movement is life.
Well, I really hope this modest description of our workflow on the animation side of Dead Cells will help you in one way or another for your next project. Although, the main take here is perhaps not the details of how we work, but in the impact a well thought out workflow can have on the success of your project.




 ꒳
꒳


More: Console/PC, Indie, Art, Production, Video, Deep Dive